Installing BBToolsets for Bluebeam Revu 2018-2019 and Revu 20-21
This video (and the article below the video) takes you through how to install all of the components of BBToolsets in Bluebeam Revu 2018, 2019, and Revu 20 through Revu 21.
Installing the Toolsets
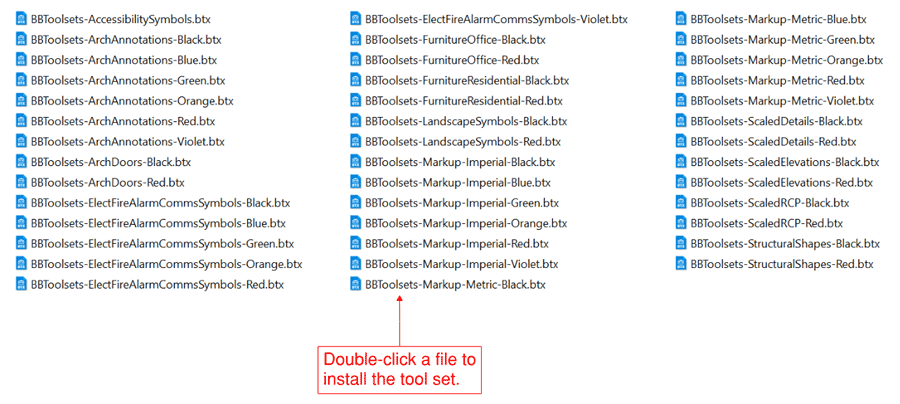
Installing the tool sets is very easy. Just unzip the ZIP file that you downloaded, navigate to the Tool Sets folder, and double-click the .btx files that you want to install.
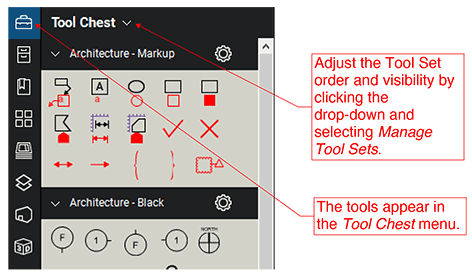
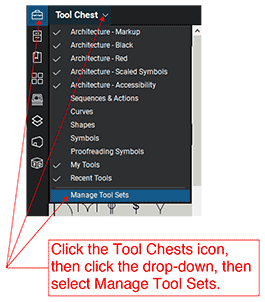
The tools are now located in the Tool Chest menu. You can change the order and visibility of the tool sets by clicking the Tool Chest dropdown arrow and selecting Manage Tool Sets.
Scaled Symbols Tool Set
The tools in the Architecture - Scaled Symbols tool set only work in Bluebeam Revu 2015 and later. They are set up with a base scale of 1/4" = 1'-0". The size of the inserted object will change depending on the scale you have set for the document or viewport. You can change the document scale by clicking on the Measurements toobar.
In all versions of Revu prior to 2015, the objects will insert at 1/4" = 1'-0" regardless of the document or viewport scale.
Installing the Line Styles
Navigate to the Line Styles folder and then double-click the BBToolsets-Arch-Line-Styles.blx file to install the line styles.

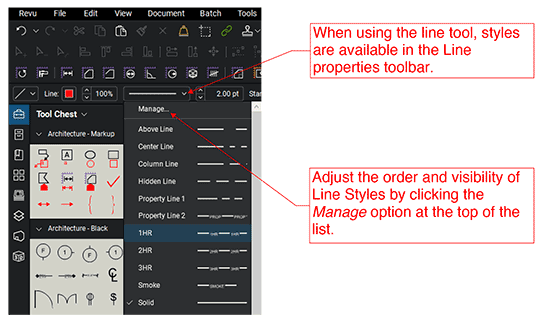
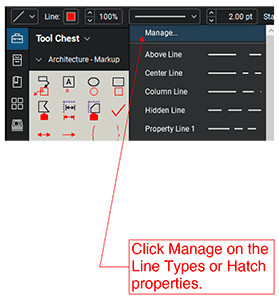
The line styles can be adjusted using the Line Properties toolbar. Adjust the order and visibility with the Manage option, which is at the top of the list of Line Styles.
Installing the Hatch Patterns
Navigate to the Hatch Patterns folder and then double-click the BBToolsets-Arch-Hatch-Patterns.bhx file to install the hatch patterns.

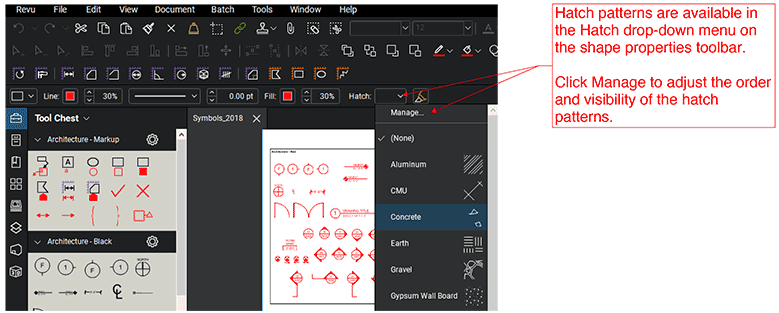
The hatches are now available in the Hatch drop-down of the Shape Properties toolbar. Adjust the order and visibility with the Manage option, which is at the top of the list of Hatch Patterns.
Installing the Submittal Stamps
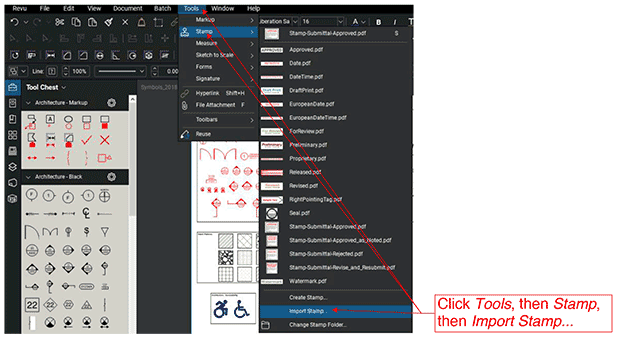
Start by clicking the Tools menu and then click Stamp. In the drop-down menu, select Import Stamp...
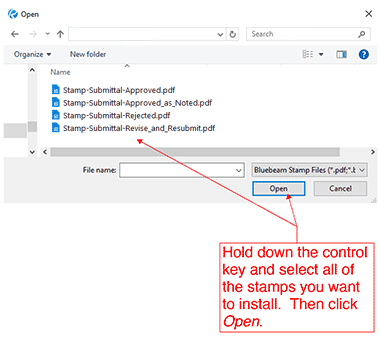
In the Open dialog box, navigate to the Submittal Stamps folder inside the BBToolsets folder. Hold down the control key and select all of the stamps you want to install. Then, click Open.
Installing the Sketch Templates
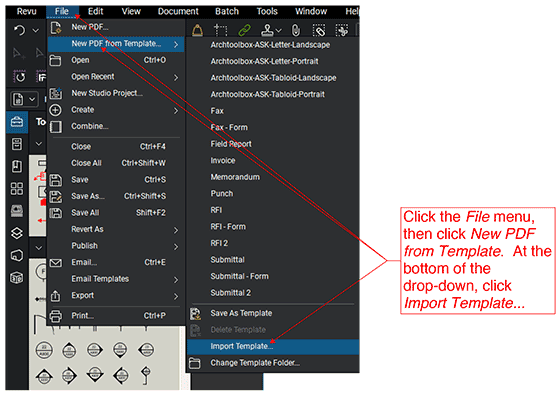
Click the File menu, then click New PDF from Template. At the bottom of the drop-down, click Import Template...
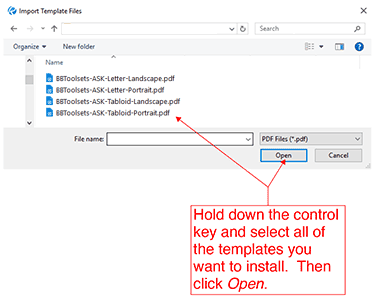
In the Import Template Files dialog box, navigate to the Sketch Titleblocks folder inside the BBToolsets folder. Hold down the control key and select all of the templates you want to install. Then, click Open.
Using the Profiles
Profiles allow you to quickly set up the look and feel of your Bluebeam program to match whatever task you are doing. The BBToolsets profile will move all of the Bluebeam tools to the top of their respective menus. It will also set up your window to make architectural markups and tasks easier.
IMPORTANT: Be sure to save your current profile if you like the way you have Bluebeam Revu set up on your computer. That way, you can switch back to your profile if you don't like the BBToolsets Profile layout.
Importing the profiles is easy. Navigate to the Profile folder inside the BBToolsets folder and then double-click on the .bpx file you want to install.

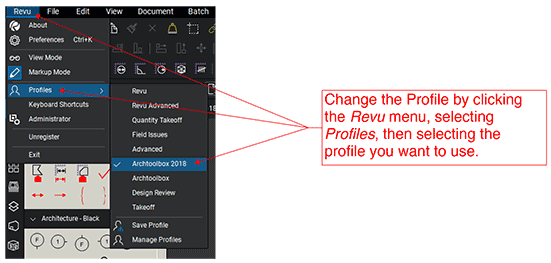
You can change the profile by clicking on the Revu menu, then Profiles, and then select your preferred profile.
Troubleshooting
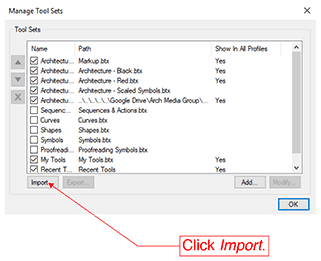
If you get any errors when trying to install the various tool sets by double-clicking them, simply try to import them from the menu by clicking the Tool Chest drop-down, then selecting Manage Tool Sets. Select Import from the pop-up dialog and navigate to the BBToolsets Tool Sets folder to select the btx files you want to install.
If you have errors when trying to install the line types or hatch patterns by double-clicking them, try to import them by using the Manage option at the top of the list and then select Import from the pop-up dialog.
If you have any other problems, please send us and email using our contact form.